There are always projects in our house. I can’t help myself sometimes, I tend to over-commit to new hobbies.
Still, this one was extra special and it took extra love. I had seen a Facebook friend create one of these mosaic stepping stones, and I knew that I had to make one. It helped that she pointed me to materials and so I also felt accountable to sharing the finished product.
The last owner of our house had left 30 or so concrete stepping stones out in the yard, and none of them are particularly impressive or pretty. It seemed like an opportunity to involve the kids in something new, and reuse materials we already had. Unfortunately the kids quickly lost interest, but I was able to use Mini C’s original design as the basis for the final product.
Mainly because creating a mosaic is essentially tile work. (I had a few flashbacks to when my husband re-tiled our bathroom). The kids also especially disliked the smell of the thinset, which I admit, is fairly strong and wearing a mask while working with it is recommended.
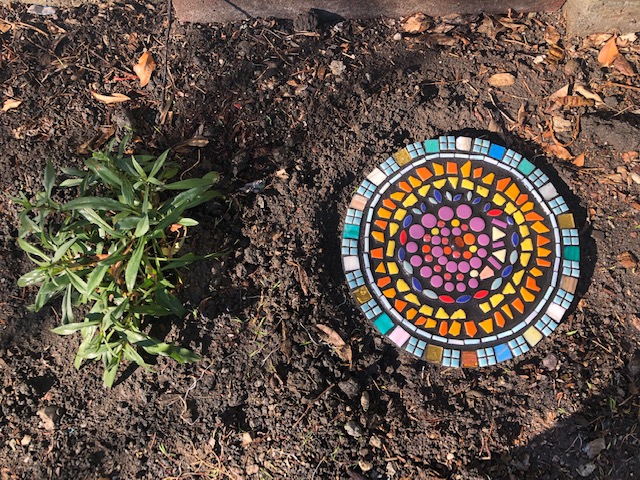
You will see that I spaced the pieces out by a lot, and there is a lot of space for the grouting. That was intentional because the closer you place the pieces together, the more meticulous you have to be about placing the mosaic pieces, and you have to put down more pieces. Since I’m not much of a puzzle fan, I didn’t have the patience for perfect fittings for this first one. I also needed to work quickly, because as a busy mom, I wanted some beauty but I can’t expect perfection.
From start to finish, if I’m to be realistic, between the usual chores, weekend day trips and the regular mundane of life, it took 3 to 5 months from start to finish. Other parents have also asked me if I would suggest this project for toddlers. I think it would be fine for a 4 year old preschooler, but definitely keep a close watch on your child. I also would not expect a child of that age to have a long enough attention span, so you could have them work on it in 15 minute bursts. I would suggest at that age that you let the kids set down the tiles dry and if you’re willing to take the extra time as I did, you can glue them down later with thinset when they are down for a nap. While it does take longer to do it this way, it helps because later on you can replace the pieces as you like them.
While it is a more challenging project, don’t let all of this discourage you, I found that the effort and process was worth it. I especially love that we can add a little personalized charm in our garden – and this one was designed by my child, so it’s a souvenir as well.
Materials
(The materials I chose below are graded for the outdoors, if you choose to make mosaics that are for indoors only, you won’t need industrial grade grout or thinset)
- 12 inch concrete stepping stone – you can also get backer board and shape it as you like
- Black grout, about 1 ounce at a time with a bit of water (I used: Prism in Charcoal)
- Pre-mixed thinset
- Assorted mosaic tiles – you can find them here, here, and here.
- Variety of art palette knives
- A pencil for sketching out a pattern
- Goggles and mask (for thinsetting)
Instructions – tbd
- I originally sketched out the pattern in chalk, which ultimately was not the best idea because the thinset could not stick well to the cement. A regular yellow pencil will do best.
- For a first mosaic, it’s recommended to draw a spider web pattern, so you want to draw out 8 pie pieces, and then smaller to larger concentric circles.
- You can then place your tiles as you like them, lay them down dry along the circles of your mosaic pattern.
- When you’re happy with it, lay it down with the thinset and let dry.
- Final step! On a different day, put down the grout and mix based on manufacturer’s directions.
